
If the Motorola baby monitor not pairing, disconnect the units first. Then, recharge or replace the battery pack from the parent unit. When there is the confirmation of no out of the signal issue, reset and pair the units.
We are going to discuss each step in detail. If you are struggling with the same problem with your device, then our discussion will assist you in fixing it effectively. Let’s get started.
Table of Contents
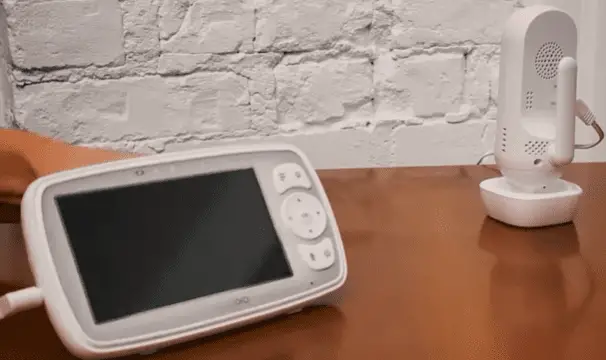
Motorola Baby Monitor Not Pairing [5 Easy Solutions]
It is the most common issue, according to Motorola users. Some of the possible reasons are weak signal, interruption in frequency, broken pair, or wrong installment of the units. Let us assist you to break down this issue.
1. Disconnect the Units From Electrical Power
If your Motorola monitor fails to connect with the camera, the first step will check the power supply. When there is no fluent electrical supply, the device will start malfunctioning.
In various cases, cracked wires or defective power cords will create lags. So, before calling the technician, let’s follow the below steps:
Solutions:
- Turn off the parent unit.
- Also, turn off the baby unit or camera.
- Now, unplug it from the electrical power.
- Disconnect the unit from the AV cable
- Check the electrical outlets and surface. Verify all are well working.
- Sensibly check the visible wires. Replace damaged ones.
- Finally, reconnect the cable and plug it into the outlet.
- Verify the connection with the outlet and make sure its secured
- Now, move to the next step.
2. Check the Battery Pack
After disconnecting and reconnecting the power supply, the next step is checking the battery pack of both units.
In the parent unit, there installed a battery, which needs to recharge for a couple of hours. When the charge is too low, it may disconnect the pair from the baby unit.
In some cases, the battery may get drained, and it is not for use more. Also, if somehow the battery is distracted from its place, the unit will not function properly.
Solutions:
- At first, inspect the battery by unscrewing the back cover.
- If you do have not a screwdriver near your hand, take a sharp object and pry the battery cover off.
- If it is so long of using the battery, it will be better to change it now.
- Install the new battery in an accurate place and connect the cover.
- Also, if the battery is well working, there may be out of charge. Recharge the unit.
3. Is the Signal Out of Range?
Out-of-signal or bad signal quality is the major cause for failing to pair with the camera. For communication of the parent unit with the camera, there needs a strong signal connection.
A low signal or no signal will not let the units operate properly. Let’s know the reasons why there will cause out of signal:
- Having any large object in between them like refrigerator, mirrors, or doors.
- Incorrect position of the camera and the parent unit.
- Installation of the units on an unsecured surface.
- The camera and receiver are long distances.
- The monitor out of range of the camera.
- Having similar frequency devices in between of them
- Frequency interference
Solutions:
- Start by checking if there are any hard obstructions between the camera and the monitor.
- Verify they are not placed in long distances. Also, not closer than one meter.
- Make sure that the units are installed in a secure place.
- You must have to mount the camera in the range of your parent unit.
- If your parent unit is using an antenna, make sure it is not broken. Also, place it in an optimal reception, where the cameras are mounted.
- Remove all wireless devices like stereo speakers, mobile phones, Wi-Fi routers between them.
4. Hard Reset The Units
After confirming the power supply, batteries, and proper installation of the units, your next step is resetting the units. A factory reset erases all the data from the devices.
Also, it will help to dismiss all the disturbing factors that are obstacles to pairing the units. Don’t worry if you are unknown of the right procedure for resetting a baby monitor. Go through it with us.
How To Reset Motorola Baby Monitor?
- Hard Reset the Baby Monitor Camera: Turn on your camera unit. Then, you will see a power button underneath the camera. Press it. Turn off the camera while pressing the pair button. Keep holding the pair button for ten seconds. After that while, switch on the camera while you continue to press the Pair button. A beeps sound and blinking the LED light on the camera signifies the hard rest of the unit.
- Reset the Motorola Baby Monitor: After the camera, reset the monitor as well. You will find a pinhole button on the monitor’s left side. Press the pinhole button using a pin. Then the monitor will turn off, and it starts again after some while. The reset is done.
5. Final: Pair the Units
The final step is pairing both units. Here we have included the absolute step to pair the Motorola baby monitor.
How To Pair Motorola Baby Monitor
- First of all, turn on your monitor, and a green indicator will be ON.
- Then, press the menu button.
- Move to the camera option using the Right and Left navigational buttons. Select it.
- Now press the Up/Down button to choose your desired camera. Use + symbol to add the camera.
- Then press Ok to confirm it.
- Now, you have to press the pair button from underneath the camera unit.
- After some while, the pairing will complete, and you will see a camera screen appearing on display.
Wrapping Thoughts:
Hopefully, now you are clear why there is a paring problem in your baby monitor. We can expect that you can fix your monitor’s problem by yourself without any hassle.
Still, if you have any additional questions regarding our discussion, don’t hesitate to let us know through a comment. We will be glad to help you out.
About Gonzalez
William Gonzalez is a passionate researcher & electronics expert who is dedicated to solve complex electronic issues. Plus, he has a passion for sharing his knowledge & expertise in this field with others. Well, he breaks down the complex technical concepts into simple terms & shares them with his readers so that they can easily troubleshoot the problems with their electronic products as well as save their pockets.