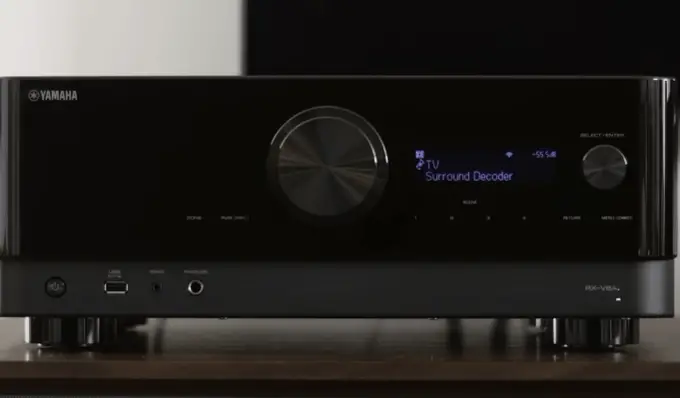
Yamaha Receiver Sound Skipping is the most typical query among Yamaha users. A faulty power supply is the main culprit for this if there are no defects on the entire components.
Also, the problem can be solved so far by resetting the receiver. Updating the receiver’s firmware is also an effective way to eliminate this issue. Stay connected with this exclusive content till the end to learn in-depth about this issue.
Table of Contents
Yamaha Receiver Sound Skipping [3 Easy Solutions]
Here, we have included step-by-step procedures in a very straightforward way. Thus, you can quickly understand those and apply them to your receiver. Without any further delay, let’s dive into the article.
Note: You can also read how to fix a Yamaha receiver with no sound problem.
1. Check the Power Supply
The faulty power supply would be the main culprit for occurring the Yamaha Receiver audio cuts out constantly. In order to ensure proper efficiency of the receiver, there is needed a correct amount of amps and volts.
If there do not have the right amps and volts in the receiver, it will automatically start malfunctioning. Additionally, loose or defective internet wires cause this issue. To fix the power problem of your Yamaha Receiver, go through our following suggested procedures:
- First, pull out the power code from the main outlet.
- Then, leave the receiver for 5-10 minutes.
- Meanwhile, check the wires of the receiver. You may inspect the receiver.
- Check the internal wirings as well. Replace the damaged wires if you find any.
- Besides, you may measure the ohm of the plug with an ohmmeter. It will be good if you see up to 8hms there. Contact the dealer for further information.
- Now plug in the power cord of the receiver.
2. Reset the Receiver
After ensuring the proper power supply to the receiver, it’s time to reset the receiver to the factory default settings. After resetting the receiver to the factory settings, it will erase all your receiver data.
If your receiver is frequently cutting the audio, you should go through the resetting procedures right now. We have included the effective steps for your convenience:
How To Reset Yamaha Receiver To Factory Setting?
- First of all, turn off the unit in order to set the unit to stand by.
- Then press the Power button. At the same time, hold down the “Straight” button continuously.
- You will see “ADVANCED SETUP” appearing on display.
- Then repeatedly press the Right Program Arrow button. Stop when you see “INIT-CANCEL” on display.
- Then press the “Straight” Button two or more times. Stop when “INIT-ALL” comes up on display.
- Finally, turn off the unit. Then turn back on.
- Your Yamaha receiver is being rested.
3. Update the Yamaha Receiver Firmware
If still, you are troubled with the audio problem on your receiver, follow this section sensibly. Sometimes back-dated firmware derives from several problems, including skipping sound issues. An updated firmware improves the function and features of the unit.
Also, you will find all the performance issues fixed that are creating problems to the function of the receiver. Without getting delay, follow the below processes to update the receiver’s firmware:
How To Update The Yamaha Receiver Firmware
- First of all, open your browser and search for Yamaha receiver update firmware.
- Then, download the file and unzip it.
- After that, copy all the files and paste them to your USB drive.
- Now come to your receiver. Turn off the receiver to set it to standby.
- Insert Your USB drive into the USB port of your receiver. You will find the port on the lower-left corner of the front panel.
- Then, press the Power Button and hold down the “Straight” button simultaneously. Keep pressing until “ADVANCED SETUP” appears on the screen.
- Next, continuously press the “Program key”. Stop when you see “FIRM UPDATE USB” on display.
- Now press the “Info” key to start the updating procedures. Do not press any button during updating. It will create interruption.
- When the update completes, turn off the receiver by pressing the power button.
- In these simple ways, you can easily update the firmware. Now turn on the receiver and check the audio.
FAQs:
What does it mean by ARC on Yamaha Receiver?
ARC is a setting on your receiver that allows you to input TV audio to your receiver. Using an HDMI cable will transmit the audio and video signal to the TV.
What is the purpose of using DTS on the Yamaha receiver?
DTS stands for Digital Theater Sound. Many Yamaha units are used DTS for formatting digital surround sound systems. Consumers use this for theatrical purposes.
Wrapping Up:
Here, we have given our level best for solving the Yamaha receiver problems. Hopefully, all our suggestions have easily understandable to you and you could easily fix the audio bug of your receiver.
But still, if there is any query regarding this, let us know through comment. We are always ready for you.


About Gonzalez
William Gonzalez is a passionate researcher & electronics expert who is dedicated to solve complex electronic issues. Plus, he has a passion for sharing his knowledge & expertise in this field with others. Well, he breaks down the complex technical concepts into simple terms & shares them with his readers so that they can easily troubleshoot the problems with their electronic products as well as save their pockets.